This page describes a hands-on activity for one of the tutorial sessions in BAEN 541, as an introduction to the BAEN 542 – Prototyping Course for Feb-April 2013.
NB:
- It is highly recommended to download the Arduino Programming Software (~80Mb, Windows/OSX/Linux) to you computer ahead of time.
- You’ll be given the physical boards during the session. Mac users should have no problems, but Windows users will likely have to Install Drivers for Windows 7 machines.
What to do before the tutorial
- If possible, download the Arduino Software to your Windows or Mac laptop (see below), as it saves some time during the session.
- Spend a few minutes view the world of 3D printing and rapid prototyping
- Thingiverse – digital designs for physical objects
- Shapeways and Ponoko
- A review of a new book on digital fabrication written by Chris Anderson, lead editor at Wired
- Read up on Nathan Seidle, the founder of electronics prototyping hub SparkFun (his recent comments on IP obesity and the business of open-source hardware might be of interest, too)
Download and Install the Arduino Software
- Get the software for you computer either from the USB discs/drives circulating around the room, or download from the website (it’s an ~80Mb file).
- Unzip the files – this could take a while on slower computers! (my netbook took ~5min).
- Follow the “Arduino – Getting Started” setup for your computer. The Mac install is relatively straightforward, but for Windows you may have to install the driver manually as described online.
Arduino Activities
- Connecting a knob to your computer
- Connecting a light sensor to your computer.
- Hardware: use a 1kohm resistor + QRD1114 sensor (use the connector and emitter leads on the sensor side, which is the darker-coloured side of the sensor). Hook up as in this schematic: Image 3
- Software: same as for the knob. (“File -> Examples -> 01. Basics -> AnalogReadSerial”)
- Control a small RC Servo motor
List of Electronics components
For a list of some useful hands-on activities with electronics, you can download the PDF “Super-Quick Intro to Electronics”
| Component | Pic | Function |
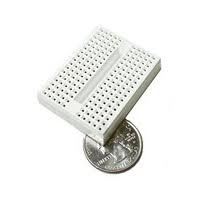
| Breadboard |  |
Connections in a Breadboard »
Correct way to connect components to a breadboard |
| 9V Battery Clip | red = positive = 9V black = negative = ground = 0V |
|
| Resistors | Used to control the amount of Electrical Current in the circuit (higher resistance value = lower electrical current). | |
| Diode |  |
Allows electricy to flow in only one direction, sort of like an electronic valve |
| Light-Emitting Diode | Note that the longer-side always goes to the postive terminal, the shorter to the negative terminal.
Always use an LED in-line with a resistor. Avoid connecting directly to the battery without a resistor (too much current, might break the component) |
|
| Transistor
Bipolar Junction Transistor (BJT) |
 |
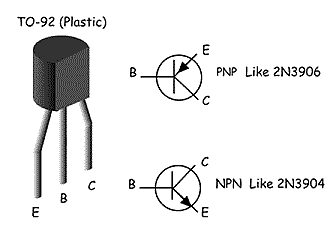
An electronic switch / amplifier. Many different styles, we use the 3904 NPN BJT. |
| Transistor
Metal Oxide Semiconductor Field Effect Transistor (MOSFET) |
 |
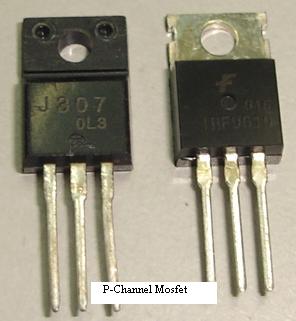
An electronic switch /amplifier. Many different styles to use, we will be using an N-Channel enhancement type (HUF-75321) |
| Push-button switches |  |
Push button down to connect the two wires inside the switch, |
Ideas and Components
- iFixIt Teardowns – A particularly instructive website for learing about what key elements are in modern electronics (and I mean very modern – they had tear-downs of the recent iPhone 3GS and Nintendo DS XL on the day of release). The tear-down of the Pleo dinosaur is particularly fun.
- Instructables has a nice collection of project descriptions.
- Download the PDF “Super-Quick Intro to Electronics“McMaster-Carr – they sell just about every mechancial device and component you can think of
- Sparkfun – electronics projets and parts for prototyping. Their forums are incredibly helpful.
- Newark and Digikey – two electronics vendors that sell everything.
- Download the PDF “Super-Quick Intro to Electronics” to learn about electronics components.
Background about UBC Engineering Physics / Physics and Astronomy
Student Undergrad Projects and Sponsors
- Kirk Madison and his research in Cold Atoms
- Light Integra
- Remote Control Kite in action.
- Titanoboa vs. Mondo Spider (also see the full-length Titanoboa)
Prototyping tools
- ENPH 253 – intro to prototyping course for 2nd year Engineering Physics students.
- Videos of the Engineering Physics prototyping equipment in action – waterjet cutter, laser cutter, and 3D printer.
- Want to manufacture your drawing? You can draw up items in any CAD drawing software (like Google Sketchup or SolidWorks or Autocad ) and submit to a 3D company like Shapeways or Ponoko – get your part in less than a week.
- You can prototype in software as well – graphical tools like processing.org make visual simulations easy to run (samples at the Phys350 – classical mechanics website)
- We often prototype electronics using the Arduino micrcontroller boards. Very popular and easy to use – and can be built up into surprisingly powerful tools.