Kinetic Art Part II – Making electronics flash and sing
During the Kinetic Art session, you saw the 2meter diameter LED ball. The designer/artist is Alex Beim, and his Vancouver-based company is Tangible Interaction: http://www.tangibleinteraction.com/
In this session, we will use the same electronics kits used in the Kinetic Art workshop to extend to different types of sensors and interactive elements – the same type of accelerometers, light sensors, speakers and other devices used in real-world elements and by people like Alex on his projects. By the end, you will have a chance to get a very brief taste of some computer programming when done with real devices, whether for interactive technologies or ones found in industry all over the world.
Requires a computer with the Arduino software installed and ready to go. No clothing restrictions (no metalwork this time around)
___________________________________________________________________________________
1. Download Software here
- Note the risks to your personal laptops when working with the Arduino boards here (pdf)
- Your first time working with programming or looking at code? Look here for some starter advice:
- Modifying existing Arduino programs [ladyada.net]
2. Pick up a kit
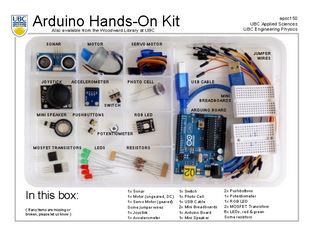
- List of all things in the Electronics Kit here.
3. The original videos from the Kinetic Art Activity
(1) Introduction to the Arduino board
(2) Download and install software and drivers for Windows7 …….Apple OSX …….Linux…….Windows8
(3) Ensure communication with your Arduino board
(4) A first look at Arduino software sketches
(5) Working with a breadboard and external components
(6) Attach your first external component, an LED
(7) Using the Arduino serial monitor
4. Try New Items!
- Work of the PDF’s: schematics and code are provided.
- Once you get them to work, try combining several of them into something new.
